How to Make 3 Easy Bathroom Projects // Woodworking

Description
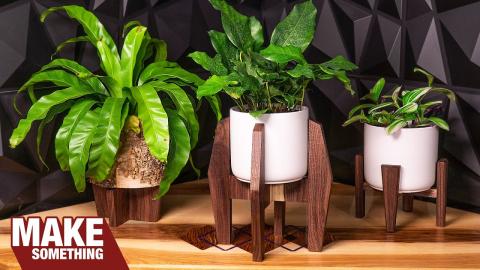
If you've ever wanted to add some beautiful accents to your bathroom, here are 3 quick and easy projects you can do with really basic tools.
Subscribe to my channel: http://bit.ly/1k8msFr
Second Channel: http://bit.ly/iltms-2
MORE PROJECTS, POSTS AND EVENTS
http://www.iliketomakestuff.com
TOOLS & SUPPLIES (affiliate links):
Brass Rod: https://amzn.to/2Yf5M35
https://kit.com/iliketomakestuff/my-woodworking-tools
https://kit.com/iliketomakestuff/shop-safety-gear
I WROTE A BOOK!!
http://www.iliketomakestuff.com/makingtime
Want to support ILTMS? Get exclusive content and more...
http://www.iliketomakestuff.com/patreon
BUY A SHIRT, STICKER, NOTEBOOK, DIGITAL PLANS and MORE!!
http://www.iliketomakestuff.com/store
FOLLOW:
http://twitter.com/iliketomakestuf
http://www.twitch.tv/iliketomakestuff
http://instagram.com/iliketomakestuff
http://facebook.com/iltms
MUSIC: http://share.epidemicsound.com/iltms
I love teak wood, it is a very dense and oily wood, which makes it great for wet areas. Teak is used in a lot of boating applications and outdoor furniture. To make a soap dish that can stand up to wet soap, I decided that it had to be teak. I happened to have some extra teak wood laying around, so I used some scraps to make a few of these bathroom projects.
First, I cut the 1/4" groove in the bottom of a rectangular piece of teak. Then, I turned the piece 90-degrees and cut that rectangle into thinner strips. Next, I cut some 1/4" wide feet made from teak that will fit inside of those dados we cut earlier. Using some spacers, I glued the thin strips along the top of the 1/4" feet with an equal gap between the pieces. Once dried, I was left with a simple wooden trivet that I cut in half to make two soap dishes. For some added style, I sanded in a little scoop on the top and finished both dishes with some teak oil.
My wife wanted some places to hang hand towels but didn't want conventional bathroom rods. We decided on a hexagon shape made of bent 1/4" brass rod mounted to a simple hexagon teak base. Again, I used some scrap teak and cut two hexagons using a paper templated I printed out. The rod would connect to the base by a simple teak block with a hold drilled in it. To match the design, I cut the block to match the same hexagonal angles.
The brass rod wasn't going to be bent into a full hexagon, maybe 5 1/2 of the 6 sides. To do this, I used a torch and heated up sections of the rod and bent it to 120-degrees using a digital angle gage. The heat discolored the golden color of the brass, so I used the buffing wheel to bring most of the color back to life. After routing in some keyholes in the back of the teak bases, the brass rods were press fit into the base.
One wall beside our new bathtub was particularly bare. Our intentions were to mount some shelves and hang some plants. I didn't have enough teak to make shelving, so I went to Lowe's and bought a single cedar board. From this board, I cut some strips to create 4 separate shelving brackets. I decided to make some simple brackets consisting of an upright that sits on the wall, a horizontal shelf support, and a 45-degree brace to connect the two. Using some glue and screws, the brackets came together really quickly and will stay together very nicely.
The soap dish can be set on any surface, but you may note that the soap goo could just seep through and pool on the counter. I plan on keeping these in the shower and on the edge of our sink, so that mess isn't really an issue.
The towel hangers will be mounted to the wall using the keyholes we added to the back of the bases. I marked corresponding locations on the wall and drilled through the sheetrock and added some anchors. To ensure that the towel hanger sits firmly against the wall, you may need to adjust the screw depth within the anchor. I added some nice towels and they looked great!
To mount the shelves, I found the studs behind the drywall using a stud finder and screwed the brackets to the wall. After making sure the brackets were level, I laid down the shelf platforms and drove a screw down through the board and into the brackets. I was very happy with the stability of both shelves and super confident that they could hold the weight of the plants, containers, or whatever else we chose to place on them.
I set out to make a big impact on the bathroom's look without spending a lot of money and without using tons of tools. You may not have teak scraps laying around, but you can get an inexpensive cedar board from any box store. I hope this gave you some ideas on how to spruce up your bathroom, or any room for that matter, with some simple woodworking projects. You can do these projects in a weekend and look like the remodeling hero that you've always wanted to be!