How to Make a Modern Dresser // Woodworking

Description
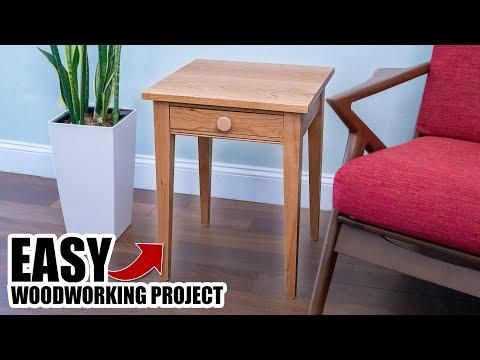
I made this huge, modern dresser with cherry drawers for my boys.
For 10% off your first purchase, go to http://www.squarespace.com/iltms.
Subscribe to my channel: http://bit.ly/1k8msFr
Second Channel: http://bit.ly/iltms-2
MORE PROJECTS, POSTS AND EVENTS
http://www.iliketomakestuff.com
TOOLS & SUPPLIES (affiliate links):
https://kit.com/iliketomakestuff/how-to-make-a-modern-dresser
https://kit.com/iliketomakestuff/shop-safety-gear
Twitch Stream Every Wednesday @ 11am EST: www.twitch.tv/iliketomakestuff
I WROTE A BOOK!!
http://www.iliketomakestuff.com/makingtime
Want to support ILTMS? Get exclusive content and more...
http://www.iliketomakestuff.com/patreon
BUY A SHIRT, STICKER, DIGITAL PLANS and MORE!!
http://www.iliketomakestuff.com/store
FOLLOW:
http://twitter.com/iliketomakestuf
http://www.twitch.tv/iliketomakestuff
http://instagram.com/iliketomakestuff
http://facebook.com/iltms
Since we moved last summer, my 3 boys have been storing their clothes in boxes and temporary piles on the floor. It is now time to build them a combined dresser so that each kid has 4 big drawers to himself. This dresser will be made to fit in a specific space, so plans won't be available, but you can follow along just the same.
Making the outside of the dresser is just like making any other piece of casework. Whether it is cabinet, a bookshelf, or a dresser, it all starts with making a box. I cut the top, bottom, sides, and dividers out of 3/4 inch plywood using my circular saw and my table saw. As I tend to do, I attached all the pieces of the case with pocket screws. I cut the 2 dividers out the plywood as well and also secured them with glue and pocket hole joinery. The dimensions of this outer case were made by measuring the intended space in the room and dividing that total width by 3, the number of columns of drawers.
This dresser is going to have A LOT of drawers, 12 to be exact. Each drawer has 4 sides that need to be cut to size and need a rabbet cut on both ends. Josh and I set up an assembly line and made relatively quick work of the drawer construction. We used luan for the drawer bottoms and slid them in place before closing up the sides.
Because this dresser has 12 large drawers and because we want a consistent 1/8 inch reveal all around the drawer fronts, we had to use nicer drawer slides. I bought a bunch of the cheaper, undermount slides, but they had a lot of play and I wasn't confident that they would stand up to the abuse from 3 boys. Therefore, I had to spend $20 a pair for the nicer slides at the box store. Josh made a jig to mount the slide on the drawer box, while I used the Kreg Drawer Slide Jig to place the other parts in the case. You have to be sure to measure correctly before placing the slides to get that consistent 1/8 inch gap around the cherry faces.
Our local hardwood supplier had some beautiful pieces of cherry that would fit this project perfectly. I used the miter saw to cut the boards to a rough length before using the jointer and planer to make them perfectly straight and uniform. To ensure that the drawer faces were perfectly positioned, we placed them on the drawer bodies inside the case. Once the 1/8 inch gaps were nice and even, we stuck the faces to the bodies with double-sided tape.
After that, I drilled some holes through the drawer body, into the back of the face and screwed the two together. This method gave me some registration marks so that each drawer face would line back up with the drawer bodies perfectly after I cut the individual faces. I then cut the 12 drawer faces from the 4 long boards, notched out some hand holds, and finished each cherry face with some Danish oil. Once they were all dry, I used the screw holes to line up and mount the faces to the drawer bodies permanently.
Josh andI lugged the dresser components into the room upstairs and I put all the pieces together. You may have seen in the video that I intended on adding some iron pipe. 3d printed legs to the dresser. Once we got the piece in the room, I decided against using the legs because I would have to clean under the dresser and to be honest it didn't need them.
The boys loaded up the dresser with all of their clothes and the room transformation was complete! This project fought us all along the way, but I'm so glad we stuck with it. The final result is amazing and I'm so happy to show off the wood grain on those beautiful cherry boards. If you liked this project, check out some more of my work!