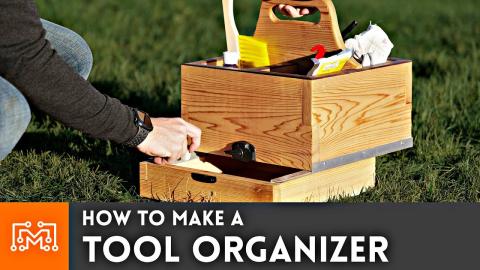
How to Make A Rolling Tool Cart

Description
Subscribe to my channel: http://bit.ly/1k8msFr
Second Channel: http://bit.ly/iltms-2
GET DIGITAL PLANS
https://ilt.ms/shop/product/rolling-tool-cart
MORE PROJECTS, POSTS AND EVENTS
http://www.iliketomakestuff.com
TOOLS & SUPPLIES WE USED(affiliate links):
https://kit.co/iliketomakestuff/rolling-tool-cart
https://www.weaverleathersupply.com/iliketomakestuff
https://kit.co/iliketomakestuff/my-woodworking-tools
https://kit.co/iliketomakestuff/shop-safety-gear
I WROTE A BOOK!!
http://www.iliketomakestuff.com/makingtime
Want to support ILTMS? Get exclusive content and more...
http://www.iliketomakestuff.com/patreon
BUY A SHIRT, STICKER, NOTEBOOK, DIGITAL PLANS and MORE!!
http://www.iliketomakestuff.com/store
FOLLOW:
http://twitter.com/iliketomakestuf
http://www.twitch.tv/iliketomakestuff
http://instagram.com/iliketomakestuff
http://facebook.com/iltms
MUSIC: http://share.epidemicsound.com/iltms
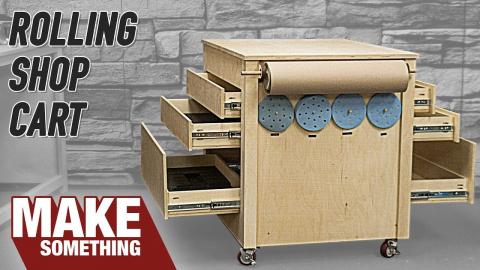
Like most of my shop projects, this cart needed to solve a problem. I recently got into leatherworking and I wanted a way to keep the tools, equipment, and dyes separate from the rest of my dusty shop. I have most of my large shop fixtures on wheels so I can move them to clean or rearrange if needed, and this cart would too. The idea is that this rolling cart could hold any specialty tools that needed to be segregated from the rest of the dirty space.
I modeled the cart in Fusion 360, making sure to assign parameters to the sketch so I could easily change any element of the design. If I wanted it taller, wide, deeper, more or less drawers, I could simply change a few variables and the program would update my model instantly. I decided to go with a simple cart, taller than it is wide, with two removable drawer trays, an area to hold a small granite slab, and a =n open section on the bottom for dyes and oils.
Following my design's cut list, I broke down some 3/4" plywood on the stable saw and cut some rabbet joints for the top panel and sides. To place the shelves, I'm going to cut some dados.
To fit the shelves within the cart, there are a few methods we could ways. If you wanted the shelves to be adjustable up and down, you could use a shelf-pinning jig and drill a bunch of holes in the interior space. The shelves would then sit on small pegs so you could position them to fit whatever you wanted to place in the interior space. For our cart, I am placing removable drawer trays on the shelves without drawer slides, so adjusting the shelves would be unnecessary.
To hold the shelves you could also use pocket holes to screw the shelves into the inside of the side walls. For our cart, I want to cut some dado channels into the sides. You can cut the dados by using a set of stacked saw blades specifically designed to cut channels. Those blades are hard to get in a lot of countries, but you can also cut the slots using your regular table saw blade. To get matching dados, cut one side panel and then the other before moving the fence. for the next shelves.
If you wanted to have traditional drawers in your rolling cart, that's totally fine. Most drawer slides are 1/2 inch wide, so you would have to adjust your drawers to be 1 inch more narrow (for 2 slides). I purposefully didn't want to use drawer slides so that I could take the drawers over to my workbench and use them. These drawers are deep enough for a lot of specialty tools, and they are even deep enough to make a secondary tray for smaller items. The whole point to to organize the tools, not to make an entire workbench for each tool set.
The drawers were made with the same 3/4" plywood as the rest of the cart with the bottoms being made from thin luan. Simple glue and brad nails holds each drawer together and glue in the rabbet on the bottom holds the draw bottom in place. I added a simple walnut handle to each side of each drawer and they were ready to slide into place. Using some more walnut, I added some edge banding to cover up the plywood layers.
Like I mentioned earlier, all of my major shop fixtures and tools are on mobile bases. This allows me to rearrange my shop when I need more space, and it helps me clean around big items. The intent behind the rolling tool cart is that the specialty tools can be stored away when not used and roll into place when needed. One major problem with carts on wheels is that they roll away when you're using them.
I want to mount a manual sewing machine on the top, and having the cart rolling around the shop while I use it would be terrible. Fortunately, there are these awesome caster that have a lifting pedal on them to raise and lower the cart with just your foot. Step on the handle and cart is lifted off the ground and freely moving; release the levers and the tool sits firmly on its base.
This option allows you to make a simple plywood version that you can stack, side by side under a workbench and retrieve items as needed. This modular and specialized tool storage system is really great for a lot of disciplines.