How to Make a Secret Room (Through a Wardrobe)

Description
We made an entire secret room; including a wall, a wardrobe, and a secret lock system! Come see how you can do the same in your house. This video was sponsored by Lowe's and Dremel. Find out more about the Multi-Max 50 which helped bring this project to life at https://low.es/2V8SBUt
Subscribe to my channel: http://bit.ly/1k8msFr
Second Channel: http://bit.ly/iltms-2
MORE PROJECTS, POSTS AND EVENTS
http://www.iliketomakestuff.com
HOW TO MAKE A SECRET BOOKCASE: https://www.youtube.com/watch?v=V3NGBo2M1Ps&t=6s
SOLDERING // BITS: https://www.youtube.com/watch?v=1qqh0GkTonc
DOOR LOCK CODE: https://github.com/iliketomakestuff/iltms_secret_door_magnetic_lock
TOOLS & SUPPLIES (affiliate links):
Dremel Multi-Max 50: https://low.es/2V8SBUt
Style Selections Floating Shelf: https://low.es/2VGIKVm
Utilitech Recessed Lights: https://low.es/2PEFXXg
Kreg Accu-Cut System: https://low.es/2LhkCEN
Tapcon Anchors and Bit: https://low.es/2PHbRm2
LeGrand Outlet w/USB: https://low.es/2PQocoh
Jeld-Wen Hollow Core Door: https://low.es/2GXMHNm
Electromagnet: https://www.amazon.com/dp/B00JERC00S?tag=ilik-20
Southwire 14ga. Wire Bundle: https://low.es/2VduZOH
Adjustable Gang Box: https://low.es/2vz739a
ESP8266 Micro-Controller Board: https://low.es/2VduZOH
Paint Colors: Walls: Reflection by Sherwin-Williams. Wardrobe: Water's Edge by Valspar
https://kit.com/iliketomakestuff/my-woodworking-tools
https://kit.com/iliketomakestuff/shop-safety-gear
I WROTE A BOOK!!
http://www.iliketomakestuff.com/makingtime
Want to support ILTMS? Get exclusive content and more...
http://www.iliketomakestuff.com/patreon
BUY A SHIRT, STICKER, NOTEBOOK, DIGITAL PLANS and MORE!!
http://www.iliketomakestuff.com/store
FOLLOW:
http://twitter.com/iliketomakestuf
http://www.twitch.tv/iliketomakestuff
http://instagram.com/iliketomakestuff
http://facebook.com/iltms
MUSIC: http://share.epidemicsound.com/iltms
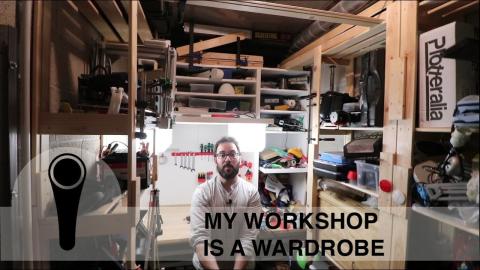
This project was meant to separate a long room in Josh's finished basement. The intent was to make a non-load bearing wall that cut the long room into a bedroom in the front and a secret office space in the back. To make it fun, Josh designed a corner wardrobe that you could walk through. To keep out little kids and to add to the secret allure, the doorway would lock and unlock with a hidden switch.
Building the wall is pretty straightforward. We used 2x4 studs cut to match the height of the room and span from one side to the other. I also had to leave enough room on one end for the doorway. The wall studs were nailed in place every 16 inches and secured to the floor using Tapcon anchors. We researched the risks of placing a new wall over the carpet, and Josh decided that it was a better option than removing the carpet in that area and adding new tack strips.
Because we intended on running new lighting into the office, Josh ran wiring through an existing soffit and down through the wall on a new circuit. This way, we could rough in a light switch and two outlets in the new wall. We added 3 new low-profile recessed lights into the room which made the space much more usable when blocked off from the rest of the room.
Now that the wall was up, we had to add the door that would also act as the back panel in the wardrobe. We purchased a blank, hollow-core door from Lowe's and a pack of hinges. I didn't get a pre-hung door because those doors are centered within the attached door jams. Our door needs to sit flush up against the doorway so there wouldn't be a weird recessed back panel in the wardrobe.
Josh added some mortices to the door's edge to accept the 3 hinges. I had to do the same thing to the door jam spacer that we created. I screwed this spacer directly to the wall stud and hung the door in place.
To hide the entire opening, we designed a corner wardrobe with two doors and some hanging hooks on the inside. Josh wanted to make sure that the wardrobe was functional and inconspicuous, not giving anyone a reason to know that there was something going on behind the piece. He drafted up a cut list using Fusion 360 and we cut the items out in Josh's shop.
Most of the wardrobe would be framing elements to support the two front doors. Because it was situated in the corner, one back panel would be the previously existing side wall and the other would be our newly installed door. To hide the seams, we used 1x4 boards to make "trim" on the inside and 1x6s to jut out from the wall and support the front doors. Josh used 1/4" plywood strips to add decorative trim to the single panel doors to add some character. The door panels were cut in one piece and hinged to the frame. There is no bottom trim on the doors so you don't have to step over anything to enter the secret room.
*To read more, visit https://iliketomakestuff.com/how-to-make-a-secret-room-through-a-wardrobe