How to Make an Adjustable Silverware Tray

Description
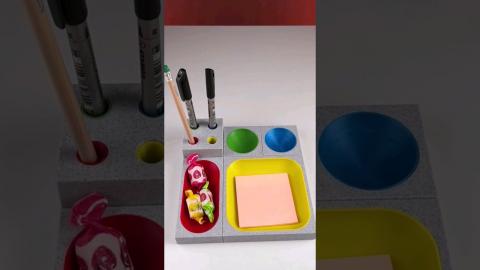
We made a sliding silverware tray that is adjustable to fit your stuff!
Go to https://NordVPN.com/iliketomakestuff and use code ILIKETOMAKESTUFF to get 75% off a 3 year plan and an extra month for free. Protect yourself online today!
Subscribe to my channel: http://bit.ly/1k8msFr
Second Channel: http://bit.ly/iltms-2
MORE PROJECTS, POSTS AND EVENTS
http://www.iliketomakestuff.com
TOOLS & SUPPLIES WE USED(affiliate links):
https://kit.com/iliketomakestuff/my-woodworking-tools
https://kit.com/iliketomakestuff/shop-safety-gear
I WROTE A BOOK!!
http://www.iliketomakestuff.com/makingtime
Want to support ILTMS? Get exclusive content and more...
http://www.iliketomakestuff.com/patreon
BUY A SHIRT, STICKER, NOTEBOOK, DIGITAL PLANS and MORE!!
http://www.iliketomakestuff.com/store
FOLLOW:
http://twitter.com/iliketomakestuf
http://www.twitch.tv/iliketomakestuff
http://instagram.com/iliketomakestuff
http://facebook.com/iltms
MUSIC: http://share.epidemicsound.com/iltms
Our first task in making an organized silverware tray was to determine what kitchen utensils needed to be store in the drawer. My whole family use forks, spoons, and knives every day and we use larger serving and cooking spoons pretty frequently. Other rarely-used tools can be stored in another drawer. Armed with this line-up, I began to make arrangements to properly store each group of items in two separate trays. My plan is for the more-frequently used items to ride on top of a larger tray underneath.
The construction for this entire project began at the home center where I purchased 1/4" thick poplar boards. This method made be a bit more expensive than buying thicker stock and re-sawing it into thinner pieces, but these were ready to go. I made a simple box frame using the Incra Box Joint Jig and fit the four sides of the upper drawer together. I also cut the sides for the larger bottom drawer, but I added some thin dado slots for the moveable dividers to fit into. The bottom box was fit together using box joints as well.
For the vertical dividers, I cut more strips of the 1/4" poplar. These silverware walls could simply be spaced inside the drawer frames to match the utensil width, but in order for you to grab the forks and spoons comfortably, I needed to add a cutout. I marked out a cove on one of the pieces and tape all of the rest of the dividers to it. Doing this, I could then cut out the same curved shape on all of the pieces at once. I cut out the rough shape on the band saw, and sanded them together on the belt sander.
The walls on the upper tray were glued in place and the walls for the lower tray were fit inside the appropriate dado slots. The bottom shelf didn't actually need a bottom because it would sit directly on the cabinet drawer. To make a simple bottom for the upper tray, I glued on a panel made from the same 1/4" poplar.
I know I'm not the only person who is irritated with the odd organization in their silverware drawer. I hope this project inspired you to go get some simple materials to make a custom solution to a common problem.