How to make an Optimus Prime Blaster Prop

Description
I made the Optimus Prime Blaster from my childhood! It's Awesome!
Subscribe to my channel: http://bit.ly/1k8msFr
Second Channel: http://bit.ly/iltms-2
MORE PROJECTS, POSTS AND EVENTS
http://www.iliketomakestuff.com
ELECTRONIC COMPONENTS
https://kit.com/iliketomakestuff/project-lightsaber-with-motion-sound
ARDUINO CODE
https://github.com/iliketomakestuff/ILTMSOptimusPrimeIonCannon
TOOLS & SUPPLIES (affiliate links):
https://kit.com/iliketomakestuff/digital-fabrication-tools-3d-printing-laser-cnc
Twitch Stream Every Wednesday @ 11am EST: www.twitch.tv/iliketomakestuff
I WROTE A BOOK!!
http://www.iliketomakestuff.com/makingtime
Want to support ILTMS? Get exclusive content and more...
http://www.iliketomakestuff.com/patreon
BUY A SHIRT, STICKER, DIGITAL PLANS and MORE!!
http://www.iliketomakestuff.com/store
FOLLOW:
http://twitter.com/iliketomakestuf
http://www.twitch.tv/iliketomakestuff
http://instagram.com/iliketomakestuff
http://facebook.com/iltms
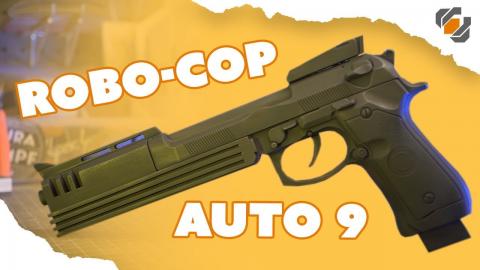
If you know anything about me, it's that I am a huge fan of 80's toys and movies. I geek out the hardest over my favorite cartoon and toy collection, Transformers. In the past I've made the Transformer's Matrix of Leadership and rigged up my Land Cruiser to play sounds form the show, but I've always wanted to recreate Optimus Prime's blaster. But I didn't want to just remake the tiny toy version, I wanted to make an ion cannon fit for Optimus Prime himself!
I began this project by using my G-1 (Generation-1) toys as reference. I researched how tall Optimus would be in real life and tried to scale the blaster to fit his real-world size. As it turns out, the ion cannon would have to be 8 foot long...so...it'll be scaled 1:2 and should end up about 4 foot long.
I had some scrap 4 inch PVC pipe left over and decided to use it for the barrel pieces that are just basic cylinders. I initially decided to cover the PVC in EVA foam sheets so that I could carve out the transitions and the detail insets. I fashioned up a wooden pistol grip and magazine that I would also wrap in foam and carve. After all those pieces were assembled and I began to notch out the details, I realized that the scale was off and I wasn't very happy with the project. I was already a few hours into the blaster and I wanted to muscle through to get it as close as I could to the actual toy. I stepped back and decided that my initial plan wasn't going to produce the beloved prop from my childhood, it was heading toward a wonky-looking cannon that wouldn't be immediately recognizable as Optimus Prime's blaster. So, I changed plans.
I still had some 4 inch PVC left over, so I decided to restart the project using those pieces (without any EVA foam) and 3d printing the rest of the intricate structure. I've had a lot of modeling practice in Fusion 360 lately, and I was confident that I could use reference photos of my old toys and recreated the blaster as a 3d model. I recently received a Lulzbot Taz 6 with a MOARstruder from Matterhackers and it really shined while printing these large parts. The MOARstruder is a custom filament extruder that pumps out 3 times as much plastic as a conventional extruder in a single pass, and it worked great!
After a lot of time modeling and printing the individual components I had to assemble the pieces. The barrel was scaled perfectly using the PVC and 3d printed accents and the rest of the bulky pieces were printed without much infill because the 1.2mm extruder made some pretty strong walls. Some of the pieces were too big to fit on the Taz 6's print bed, so they had to printed in pieces and glued together using CA glue and Bondo to fill in the seams. Then I sanded, a lot.
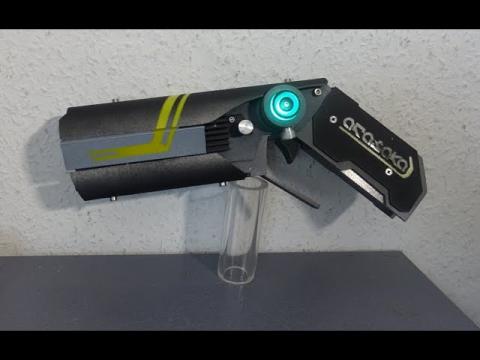
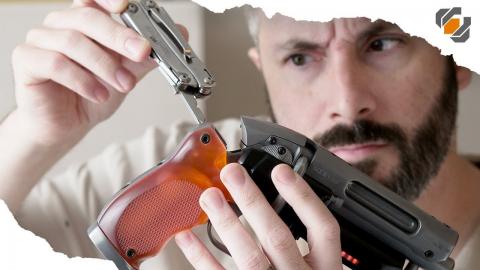
I wanted the blaster to play sounds and have lights come out of the barrel so I rigged up an Arduino Nano with an Adafruit sound board and amp that would cycle blaster sounds and lights when a button was pressed. And because there's always more than meets the eye, I had a separate button that played just Transformers sound clips. To defuse the LED strip when the lights fired, I printed a semi-translucent disc that would stand-off from the sides so that sound could still escape, but the light would be diffused. I decided to mount all of the audio components in the barrel so that the cannon could be taken apart to charge the battery back. If you want to get the code to use for you own projects, it's on my GitHub.
After a few coats of filler primer I used a metallic black spray paint to cover the whole blaster to match the G-1 toy. I lightly weathered the outside using dry brushing to give the cannon some dimension. After I was happy with the look, I went over the finished product with some clear coat to protect it.
If you enjoyed this nostalgic project, you can check out more of my prop builds!