Making A B Bender Guitar for Rob Scallon

Description
I modified a Chapman guitar for our friend Rob Scallon. This unique build allows Rob to stretch just a single guitar string to make some beautiful music. I had to figure out the mechanism, the fit, and the adjustability for this custom B Bender guitar. Check out Rob's video:
Subscribe to my channel: http://bit.ly/1k8msFr
Second Channel: http://bit.ly/iltms-2
Rob Scallon's Channel: https://www.youtube.com/user/robs70986987
Shovel Guitar for Rob Scallon: https://youtu.be/RroVxJO-kng
MORE PROJECTS, POSTS AND EVENTS
http://www.iliketomakestuff.com
TOOLS & SUPPLIES WE USED(affiliate links):
Chapman Guitar: https://www.chapmanguitars.co.uk/guitars/ml3p-trd/
https://kit.co/iliketomakestuff/my-woodworking-tools
https://kit.co/iliketomakestuff/shop-safety-gear
I WROTE A BOOK!!
http://www.iliketomakestuff.com/makingtime
Want to support ILTMS? Get exclusive content and more...
http://www.iliketomakestuff.com/patreon
BUY A SHIRT, STICKER, NOTEBOOK, DIGITAL PLANS and MORE!!
http://www.iliketomakestuff.com/store
FOLLOW:
http://twitter.com/iliketomakestuf
http://www.twitch.tv/iliketomakestuff
http://instagram.com/iliketomakestuff
http://facebook.com/iltms
MUSIC: http://share.epidemicsound.com/iltms
The concept behind this custom B Bender guitar is to pull the B string mechanically up a full or half step without affecting the other strings. There are a few existing designs to accomplish this, but I felt like a mechanical linkage made out of metal would be the most reliable and consistent. The difficult part of putting these hinged elements together was making sure that all of the mechanism could fit inside the guitar without completely destroying it.
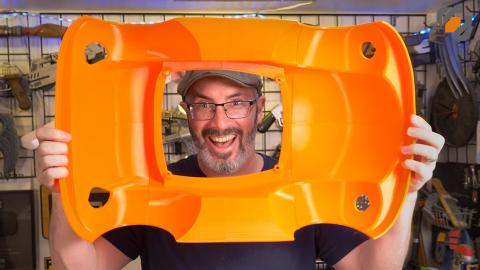
The Chapman guitar we were sent for this project was a Telecaster style, which allowed the strap nut lever to move freely. The tummy scoop on the back presented some challenges when placing the B Bender assembly. I wanted to avoid any contour cut or beveled surface because it would be more difficult to route out the cavity. After making a template of the guitar on a scrap piece of plywood and redesigning the linkage, I had a design that would work.
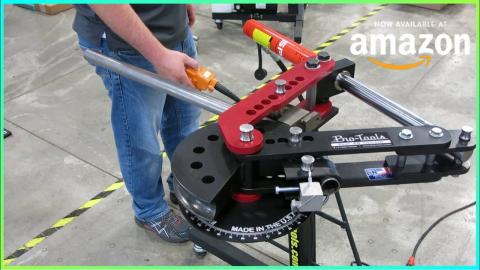
Using some scrap metal rod and flat bar stock, I cut and drilled slots and pin holes to connect the S-shaped mechanism. The screws that would act as pivot points were also used to connect the assembly to the guitar cavity. To counteract the force of gravity pulling the guitar down, and to reset the guitar upward when the player pulls the B Bender down, I had to strategically place a heavy spring alongside the linkage. Once all of this was working well on the plywood, it was time to carve a hole into that beautiful Chapman guitar.
The B Bender linkage was ready to be installed in the guitar, but I first had to cut into the back in just the right place. To make the cleanest cut I could, I chose to use the router with a guide bushing and a template. To make the template, I took a photo of the plywood mock-up and outlined it's confines. I then took this photo into Adobe Illustrator and traced the outline. Using this vector graphic, I cut a template out of clear acrylic on the Glowforge laser cutter.
Because I was using a router bushing, I had to offset the template by 1/8" so that the bit cut the exact outline I wanted. This method would give us a perfectly matched hole in the back of the guitar. I also didn't want to cover the mechanism, I think it looks awesome, so I decided to cover it with another piece of clear acrylic. This was actually really easy using the laser cutter. My first vector graphic would be the outline of the photo (this will end up being our cover); then the 1/8" offset I mentioned earlier to account for the router bushing; and lastly another 1/8" offset from the previous one so the router could carve a shallow shelf for the acrylic cover to sit on.
I taped the multi-layered template to the back of the guitar and took out each template as I finished that cut. It worked perfectly. Now it was time to place the B Bender mechanism in place and make sure it all worked.
The process of mounting the assembled linkage in place was pretty straightforward...To Read More Go To https://iliketomakestuff.com/?p=40715&preview=true