Making a Gimbal Handle (Using a Waterjet)

Description
We needed an additional handle for our camera gimbal. Instead of buying one, I made one using our new Wazer desktop waterjet machine. To find out more about the WAZER, go to https://www.wazer.com/?utm_source=iliketomakestuff
Subscribe to my channel: http://bit.ly/1k8msFr
Second Channel: http://bit.ly/iltms-2
BRAZING METAL BITS VIDEO
https://www.youtube.com/watch?v=hSTQNWdvPmA
MORE PROJECTS, POSTS AND EVENTS
http://www.iliketomakestuff.com
TOOLS & SUPPLIES (affiliate links):
https://kit.com/iliketomakestuff/my-woodworking-tools
https://kit.com/iliketomakestuff/shop-safety-gear
I WROTE A BOOK!!
http://www.iliketomakestuff.com/makingtime
Want to support ILTMS? Get exclusive content and more...
http://www.iliketomakestuff.com/patreon
BUY A SHIRT, STICKER, NOTEBOOK, DIGITAL PLANS and MORE!!
http://www.iliketomakestuff.com/store
FOLLOW:
http://twitter.com/iliketomakestuf
http://www.twitch.tv/iliketomakestuff
http://instagram.com/iliketomakestuff
http://facebook.com/iltms
MUSIC: http://share.epidemicsound.com/iltms
For shooting smooth panning shots, we use a device called a gimbal. It uses force feedback to keep our camera level and stable while it's being moved around. But one drawback of our model is that you can't comfortably carry the camera/gimbal setup in a low-slung, horizontal configuration. We decided that the solution to this is to add a rigid handle that could firmly attach to the gimbal neck, separate from the spinning head.
I began by measuring the space right beneath the spinning section. The idea was to make a bracket of thick aluminum that would clamp around the gimbal neck and support a 90-degree handle far enough away so it doesn't interfere with the camera movement. Now that I had all the necessary dimensions, I whipped up a 3d model in Fusion 360. Instead of 3d printing this piece or cutting the aluminum with my traditional woodworking tools, I'm going to use a new tool, a waterjet cutter.
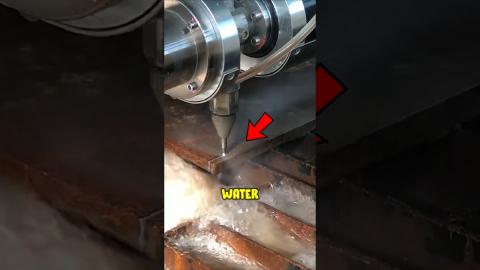
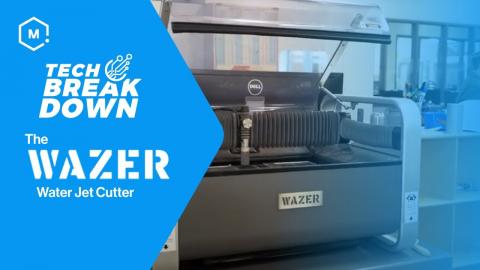
A watejet cutter works by shooting a super high pressure stream of water out of a nozzle that is attached to a moving gantry. Like a CNC, but it doesn't cut with a spinning bit, it cuts with water infused with abrasive grains of garnet. Normally these machines are found in large manufacturing setting and take up a huge footprint. But the guys at WAZER designed one that fits on a table top, and they sent me a machine to try out. Not only can it cut aluminum, but it can cut steel, glass, and a lot of other materials that desktop machines can't. Full disclosure, they are sponsoring this project.
I imported my design into the WAZER software and loaded the 1/4" aluminum into the machine. It was crazy to see that raw metal being cut out with a moving stream of water. If you don't have access to such a machine, aluminum can be cut with most woodworking tools. The handle design is simple enough that a bandsaw and a hole saw would work just as well. But if the design were more intricate, the waterjet would be the perfect tool.
My design fits together using two slots, one in the bracket and another in the 90-degree handle. The fit is loose enough that I could TIG weld the two pieces together. I have been wanting to get into TIG welding, it is a different set of skills from traditional MIG welding. Unfortunately, I couldn't get the settings right on my welder and decided to go with another method of joining aluminum, brazing.
To attach the handle to the gimbal, I cut the bracket that would fit around the neck. This gave me a clamp-looking collar that could be tightened around the gimbal with some screws. I used a metal tap to create threads in the bracket and some EVA foam to act as a gasket around the gimbal neck. I also decided to powder coat the aluminum. I used a special powdercoating setup to bond the powder to the arm and then bake it in an oven. This adds a layer of additional protection that is way tougher than paint.
To make the gimbal handle more comfortable in your hands, I needed to add some wooden scales. Similar to knife scales, these wooden pieces would be fixed to either side of the flat aluminum. I glued the wooden strips to the sides of the handle with some CA glue and then drilled some through holes for some pins. Once the scales, the handle, and the pins were all epoxied together, I began to shape the handle on the sanders. I rounded over the harsh edges and added some indexing spaces for your fingers.
Having a 90-degree handle off on the gimbal makes it so much more comfortable to use at all angles. The additional stability is great and being able to make low-slung shots is super cool! Thank you to the team at WAZER for sending me that desktop waterjet cutter. It will really allow us to cut things that we were never able to before. If you are interested inn learning more about desktop waterjet cutting, check out https://www.wazer.com/?utm_source=iliketomakestuff.