Making Custom Silicone Mats

Description
With all of the model making and electronics tinkering I've been doing lately, I wanted a custom silicone mat that could hold specific items. Silicone mats are super durable, heat resistant, and easy to clean. Have a task you do repeatedly? Let me show you how to easily make a custom silicone mat!
Subscribe to my channel: http://bit.ly/1k8msFr
Second Channel: http://bit.ly/iltms-2
MORE PROJECTS, POSTS AND EVENTS
http://www.iliketomakestuff.com
TOOLS & SUPPLIES WE USED(affiliate links):
https://kit.co/iliketomakestuff/custom-silicone-mats
https://kit.co/iliketomakestuff/my-woodworking-tools
https://kit.co/iliketomakestuff/shop-safety-gear
WANT TO LEARN FUSION 360?
We made an online course called "Fusion 360 for Makers"
https://ilt.ms/fusion
I WROTE A BOOK!!
http://www.iliketomakestuff.com/makingtime
Want to support ILTMS? Get exclusive content and more...
http://www.iliketomakestuff.com/patreon
BUY A SHIRT, STICKER, NOTEBOOK, DIGITAL PLANS and MORE!!
http://www.iliketomakestuff.com/store
FOLLOW:
http://twitter.com/iliketomakestuf
http://www.twitch.tv/iliketomakestuff
http://instagram.com/iliketomakestuff
http://facebook.com/iltms
MUSIC: http://share.epidemicsound.com/iltms
he beauty in creating your own silicone work mat instead of buying one, is that you get to design to your specific needs. Working with small items can be disorganized and troublesome if the pieces are not stored well and your tool easily retrievable. The silicone mat is awesome because it can help organize your work space while being heat resistant, tear proof, and easy to clean. Tasks like model making or electronics work can be more organized and efficient if the work surface was made to accommodate the hobby. In my case, I plan on using this mat for both of those tasks.
I decided to arrange the mat with shallow pockets surrounding a central work space. Because we'll be pouring the silicone into a mold, so all of our design elements have to be arranged in reverse to the mat will come out correctly. The pockets will be made from positive blocks and any lettering or text will be engraved in reverse. I used some scrap 1/4" MDF to act as the mold forms for the pockets. Adding some chamfers to the bottoms edges of the block will accomplish two things. It will act as a draft, allowing the silicone to release easier and it will keep the mat's pockets from having sharp corners that are hard to clean.
I wanted the open work area to have a slight texture and a cool and useful element. Using my Glowforge laser cutter, I added a simple square grid pattern and a reference ruler to the bottom. One of the larger pockets would also look cool with a design, so I scored a cool circuit pattern onto the mold block. To add some grooves to the area meant to store brushes, I cut some shallow lines into more mold blocks. Now that I had the mat's essential elements designed and created, it was time to make a mold box.
The mold needs to be a shallow box that contains all of our blocking elements, sealed to prevent leakage. I arranged the pocket blocks around the central work panel with the laser etching. Making sure to space these elements 1/4" apart, I glued them all to the bottom of the mold and sealed around their edges. At this point, I had to examine the mold closely for any defects, rough areas, or debris. Silicone will pick up the texture of your mold remarkably well, so you have to make sure every element is sanded smooth and sealed with varnish. Once I was happy with the mold and assured that everything was sealed from seepage, I added some Mold Release spray to help the mold, well...release from the silicone.
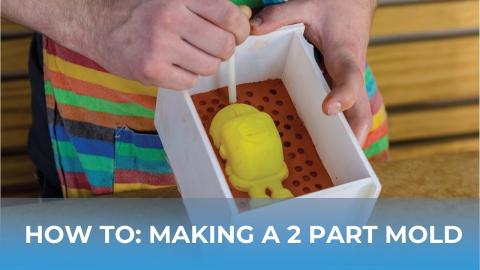
Silicone is an awesome substance. Nothing sticks to it but more silicone, it resists high temperatures, it's rubbery and durable, and you can easily clean it. This makes is a perfect candidate for a model making surface covered with glue and paint. There are many types of silicone to chose from. I, personally, like to use Smooth-On products because they are consistently good (if purchased from them or an authorized reseller) and their website has a lot of information to help you chose correctly. But, to be honest, it takes some hands-on trial and error to ensure you get the right end result.
Case in point, I began this project using the Ecoflex 00-30 silicone from Smooth-On. While this 2-part product has a decent working time, allowing me to off-gas the mixture in a vacuum chamber, the end product was right. It was far too stretchy for this application even though it mixed and poured beautifully. In the past I've used Moldstar 20t form Smooth-On for silicone molds, so I decided to try it on the mats. The working time for this mixture isn't long enough to off-gas in the vacuum chamber so I had to mix it, tint it orange, and pour it in the mold. The Moldstar 20t hardened pretty quickly and I removed the mat from the mold with ease. It looked Amazing!
You can use these techniques to make a custom silicone mat tailored to any task.