Milling Lumber // Bits

Description
In this episode of Bits, Josh describes how make turn boards into squared dimensional lumber.
Subscribe to my channel: http://bit.ly/1k8msFr
Second Channel: http://bit.ly/iltms-2
MORE PROJECTS, POSTS AND EVENTS
http://www.iliketomakestuff.com
TOOLS & SUPPLIES (affiliate links):
https://kit.com/iliketomakestuff/my-woodworking-tools
https://kit.com/iliketomakestuff/shop-safety-gear
Twitch Stream Every Wednesday @ 3pm EST: www.twitch.tv/iliketomakestuff
I WROTE A BOOK!!
http://www.iliketomakestuff.com/makingtime
Want to support ILTMS? Get exclusive content and more...
http://www.iliketomakestuff.com/patreon
BUY A SHIRT, STICKER, NOTEBOOK, DIGITAL PLANS and MORE!!
http://www.iliketomakestuff.com/store
FOLLOW:
http://twitter.com/iliketomakestuf
http://www.twitch.tv/iliketomakestuff
http://instagram.com/iliketomakestuff
http://facebook.com/iltms
MUSIC: http://share.epidemicsound.com/iltms
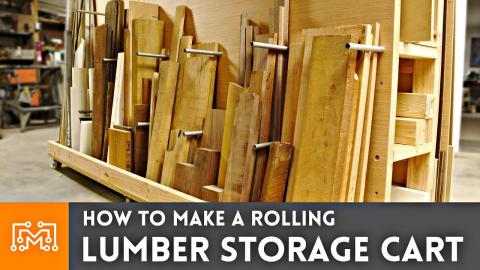
In this episode of Bits, Josh comes from behind the camera to explain the process of taking rough lumber and transforming it into perfectly squared stock. This process is traditionally done with three machines; the jointer, the planer, and the table saw.
The process begins with your wood selection at the home center. Don't just pick the first board you find in the stack, weed through them to get the straightest ones you can. You may get dirty looks from the employees, but they aren't the ones trying to build a table with wonky boards.
Next, cut your rough boards about a foot longer than your plans call for. This is to account for snipe, a result of your machines eating into the ends of your wood as you mill it. These divotted ends will be cut off later, leaving you with clean and perfectly sized lumber.
Take those boards over to the jointer and pass one face over the cutter head pushing more forward than down while it cuts. DO NOT press down over top of the cutter head or it will introduce more curvature into the wood than there was before (think curling a ribbon with some scissors). After that face is nice and flat, press it against the jointer's fence and cut a 90 degree edge in the same manner.
After you have these two flat sides, use the planer to slowly bring your boards to the desired thickness. The planer uses the flattened bottom to make a parallel to that is also flat. If you pass a curved board through the planer without flattening it, you will end up with a parallel, curved board.
After the three sides are flat, and you have reached the final thickness, use the table saw to cut off the remaining rough edge. You are now left with a perfectly squared piece of lumber that is ready to be used in any woodworking project. Squared stock is soo much easier to glue together because the faces meet up nicely. This method prevents you from having gaps in the glue lines, or having warped panels.
This process does involve tools that not everyone owns, but I assure you, if you plan on making tables, cutting boards, or anything else out of lumber, the investment is totally worth it.