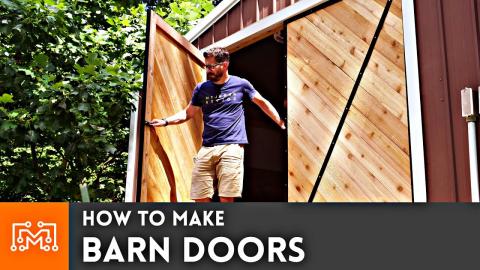
How to Make a Brass and Walnut Coat Rack // Woodworking & Metalworking

Description
Come see how I made this Walnut & Brass Coat Rack!
Check out http://DesignCrowd.com/MAKESTUFF to learn more and save up to $100 when you start your next project.
Subscribe to my channel: http://bit.ly/1k8msFr
Second Channel: http://bit.ly/iltms-2
MORE PROJECTS, POSTS AND EVENTS
http://www.iliketomakestuff.com
TOOLS & SUPPLIES (affiliate links):
https://kit.com/iliketomakestuff/walnut-and-brass-coat-rack
https://kit.com/iliketomakestuff/shop-safety-gear
Twitch Stream Every Wednesday @ 11am EST: www.twitch.tv/iliketomakestuff
I WROTE A BOOK!!
http://www.iliketomakestuff.com/makingtime
Want to support ILTMS? Get exclusive content and more...
http://www.iliketomakestuff.com/patreon
BUY A SHIRT, STICKER, DIGITAL PLANS and MORE!!
http://www.iliketomakestuff.com/store
FOLLOW:
http://twitter.com/iliketomakestuf
http://www.twitch.tv/iliketomakestuff
http://instagram.com/iliketomakestuff
http://facebook.com/iltms
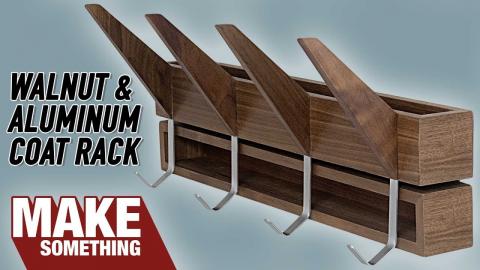
Long ago, before I put my projects on YouTube, I made a $10 Coat Rack from some simple Anna White plans, unfortunately that coat rack didn't survive the move to our new house. But recently, I was at a West Elm store a while back and I saw a coat rack with some simple metal tips. I then realized that I could use a combination of my wood lathe and my new metal lathe to make a beautiful walnut coat rack with some classy brass tips.
I began this project by milling up some walnut into small rectangular pieces that will eventually become the hanger pegs. A few longer pieces were cut down and glued together to form 2-inch square stock about 6 feet long, this will become the center post. After cutting a test piece of pine, I decided that the center trunk should be a clean octagonal post with the pegs sticking out from the flat sides. The original piece of walnut I had was about 12 inches wide, so I cut off a 12 inch long section that would become the coat rack's base. I bought some solid brass rod that needed to be cut down with the metal-cutting bandsaw.
My woodturning skills are slowly improving, so this project was going to push them to the limits. Each skinny rectangular piece had to be turned down to about 3/4 of an inch on the wood lathe. I used the square roughing tool to get a (semi)uniform thickness across the piece. This process took a while and made a huge mess, but it was really good practice turning rough pieces into straight cylinders. I then drilled some 1/2 inch holes into one end of each peg to accept the brass tips.
This was my first project using the metal lathe and boy was it a learning experience. I have watched many videos and know the concept, but that is no substitute for getting your hands on the machine and making some cuts. There were a few mishaps, I jammed up the machine at one point by pushing the cutter head too far into the brass stock, but after my heart stopped racing I adjusted and get back to work. I made a surfacing cut to clean up the face, and then slowly shaved down the cylinder to match the thickness of the walnut pegs. The tips were then flipped around in the chuck and I turned the tenon that would sit inside the holes on the end of the wooden pegs. Overall, I made 10 of these tips, some beautiful successes and some that were...not so beautiful, but overall a huge victory for me on the metal lathe!
Remember that big 12x12 inch piece of walnut I cut earlier? This gorgeous piece will become the coat rack's base. I drew a large circle on the walnut face and then used the jigsaw to cut off the excess. Using the center point of that circle, I attached the screw chuck to the face and mounted it to the wood lathe. I thought a simple circle with a nice round over would look really nice and wouldn't be too much fuss, so I carved that up really quick. To securely mount the tall center post to the base, I decided to cut an octagonal mortice into the base. Later on, I fit the center post snuggly into the base with some glue and just to be sure, I drove a screw up through the bottom to firmly attach the two.
I needed a uniform way to drill into the trunk so that the walnut and brass pegs can fit into it at a consistent angle. I couldn't get that kind of accuracy drilling by hand, and using the drill press by itself could also be problematic. Josh made a quick jig that would attach to the drill press table and would hold the trunk firmly in place. We adjusted the drill press table to 45 degrees and clamped the piece into the new jig. This method worked perfectly and we got perfectly uniform 3/4 inch holes drilled at the proper spacing on each face. All we had to do was glue the pegs into the holes. I used some blue painter's tape to cover the area around the holes to minimize any mess from the glue squeeze out. Once the pegs were dry, I finished the whole piece with a few coats of spray lacquer to protect it against constant use.
I encourage you to get out of your comfort zone and try something new. If you liked this project, check out more of my work