How to Make a Custom Leather Sheath // Leatherworking

Description
In a recent video, we forged a machete and now I need to make a leather sheath to carry it while in the woods. Come see how I used some paper templates and some help from our sponsor, Weaver Leather, to make it happen! Check Weaver out at http://weaverleathersupply.com/machete-sheath
Subscribe to my channel: http://bit.ly/1k8msFr
Second Channel: http://bit.ly/iltms-2
MORE PROJECTS, POSTS AND EVENTS
http://www.iliketomakestuff.com
TOOLS & SUPPLIES WE USED(affiliate links):
https://kit.co/iliketomakestuff/making-a-machete-sheath
https://kit.co/iliketomakestuff/my-leather-working-tools
https://kit.co/iliketomakestuff/shop-safety-gear
I WROTE A BOOK!!
http://www.iliketomakestuff.com/makingtime
Want to support ILTMS? Get exclusive content and more...
http://www.iliketomakestuff.com/patreon
BUY A SHIRT, STICKER, NOTEBOOK, DIGITAL PLANS and MORE!!
http://www.iliketomakestuff.com/store
FOLLOW:
http://twitter.com/iliketomakestuf
http://www.twitch.tv/iliketomakestuff
http://instagram.com/iliketomakestuff
http://facebook.com/iltms
MUSIC: http://share.epidemicsound.com/iltms
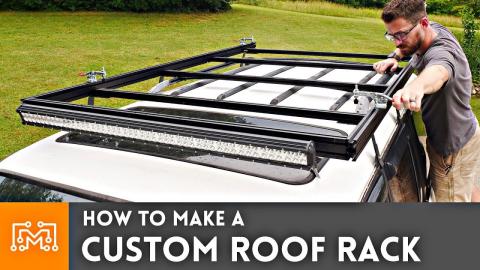
This project starts with the machete and how I wanted to carry it. There are many possibilities when carrying such a tool. I know that I'll be walking around the farm property and it's quite dense with small trees and thorn bushes. One option was to place the machete across my chest and make a shoulder holster. Another option was to make a sheath that laid against my lower back in a horizontal position. I decided to make a drop-leg sheath but align it at an angle so that I could have free range of motion with my leg. Because the property is pretty hilly and thick with vegetation, I would be bending and moving in a way that would interfere with a straight-leg holster.
I hung the machete up against my belt in the angled orientation. Noting the position and how far it was from my belt, I transferred these rough measurements to a roll of paper. I traced the machete and because I had to account for the leather that would need to be stitched together, I added about a 1/2" (1.25cm) offset to the outline. The angled belt loop was hand-drawn near the machete handle and I accounted for the extra material that would need to fold over to wrap around my belt.
I didn't have to draw two separate templates, because I could fold the leather over onto itself for one of the sides. Essentially a pocket, the folded edge would act as one of the sides not needing to be stitched. Armed with the master template, I transferred it to the leather hide I had and prepared to cut it out.
Using a sharp blade, I cut the leather along the template markings. Before I glued or stitched the sheath together, I wanted to dye the specific areas certain colors. I used Weaver's leather dyes to add some color to the outside of the sheath, as well as some black color to the belt loop section.
To help the leather achieve a tight fit around the machete, I soaked it in water and clamped it around the blade. I made sure to wrap the blade in a protective layer beforehand so it didn't rust. Now that the sheath had a stiff shape, it was time to move on. Once dried, I could just glue and stitch the sheath together, but I had an idea to add some extra capabilities to this machete holster.
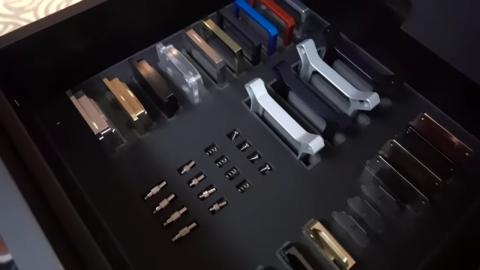
I figured that I would need to carry more than just the machete if I were out bushwhacking. The blade was eventually going to dull and need sharpening, I may hurt myself, and I may want to make a small fire. The sheath's flat face offered space to add some pockets for those items. I found a small sharpening stone and some thin fire-starting rods that would fit perfectly on the sheath. Most first-aide fits or pressure dressings were too big to fit natively on the sheath, so I'll have to carry them separately.
Just like the blade, I wanted to mold the leather pockets around the individual items to give them a snug fit. I wet some scrap leather squares and pressed them over the sharpening stone and fire starters. To clamp the leather in place while it dried, I made some rectangular clamps out of plywood that matched the shapes of the items. This process worked really well and the leather pocket forms were ready to be dyed, glued, and stitched to the face of the sheath.
At this point in the process, the sheath was dyed and the pockets were finished. It was now time to fold the sheath onto itself, glue the two halves together and add a hand stitch. I first outlined the actual machete with a pencil inside the open sheath. This way, I knew where to apply the Barge contact cement so it didn't touch the blade when inserted. Making sure the contact cement was dried, I folded the leather over and the two sides were permanently attached. At this point the two folded edges didn't perfectly match up, buts that's totally fine. I used the stitch groover to add an offset line from the outer edge.
Read more at https://iliketomakestuff.com/making-a-custom-leather-sheath/