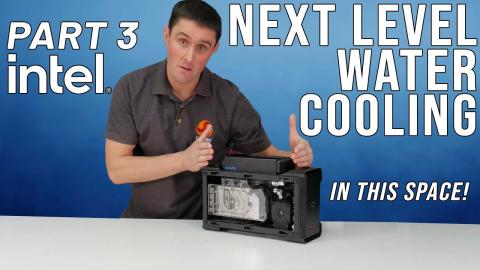
Modding the Intel NUC 9 Extreme with James. PART 4

Description
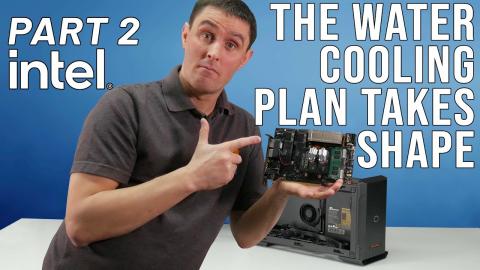
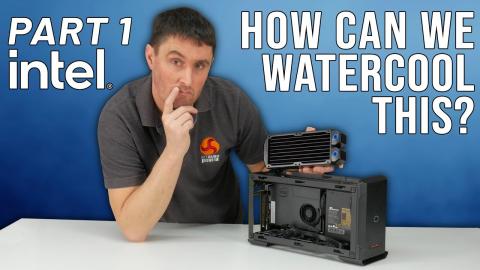
Today we have the 4th and Penultimate episode before we end our indepth Intel NUC 9 Extreme Mod. Our modding guru James Dawson today
00:00 Video start
00:03 Part 4 - Introduction
01:18 Top panel update
03:08 Some more updates
03:37 Intel Six Pillars Logo addition
04:05 Materials needed - details
07:37 Side panel work - mesh removal and clean up/preparation
11:06 Radiator preparation
11:47 Prepped and reading for painting
15:14 Radiator masking
17:12 Front panel (plastic) preparation and button removal
20:19 prepping the plastic parts
21:12 Parts reading for painting
21:37 3 coats white satin paint
23:44 Power button, blue mesh and six pillars panel
27:59 Install the radiator and fans to top panel
28:53 Power and reset buttons refitted with soldering iron
30:14 Reassembly
31:56 3D printed prototypes of mounting brackets
32:55 Change of design and in the next episode
Part 4 Video Content
• Show what materials are needed to prep and paint case panels.
• Cut out material from the side panel ready for the Intel Six Pillars Aluminium logo panel.
• Side panel mesh is removed so that it can be painted a different colour.
• Prepare the outer case panels and radiator for spray painting, rouging up, cleaning, priming.
• Remove buttons from the front panel before preparing the front panel for painting.
• The power button can be disassembled to paint the centre a different colour.
• Show how to apply primer and top coat of paint to the side panels, radiator and small parts.
• fit the Aluminum Six Pillars panel, the blue mesh and buttons back to the case panels.
• Install all the freshly painted panels to the case (maybe add some b-roll clips here?) b-roll clips are in the dropbox folder.
• The 3D Printed custom top mounting brackets for the Alphacool water block arrive, take a quick look at the new heat spreader design and a sneak preview of what is to come in the final video.
Current System Spec:
• CPU: Intel Core i9-9980HK
• Motherboard: Intel NUC 9 Extreme Compute Element board
• Memory: 16GB (2 x 8GB Modules) G.Skill Ripjaws DDR4-3200 SO-DIMM
• Graphics Card: Nvidia GeForce RTX 3080 Founders Edition
• 1st storage device: 2TB WD Black SN750 PCIe Gen3 x 4 NVMe M.2 SSD
• 2nd Storage device: 2TB WD Black SN750 PCIe Gen3 x 4 NVMe M.2 SSD
• Case: Cooler Master NC100
• System fans: Cooler Master
• Power supply: Modified Seasonic Focus SGX-650
Custom Cooling hardware:
• CPU water block: Alphacool NexXxoS XP³ Light - Black V.2
• Graphics card water block: Eisblock Aurora GPX-N RTX 3080 FE with backplate
• Tubing: AlphaTube HF 13/10 (3/8"ID) - Ultra Clear
• Fittings: Eiszapfen 13/10mm compression G1/4 – chrome
Materials Needed For Spray Painting Case panels
• Abrasive pads for roughing up the panel surface to provide a key for the paint to adhere to, wet and dry sandpaper could also be used.
• Cellulose thinners for cleaning parts, cleaning spray can nozzles after use.
• Cloths or rags for cleaning.
• Masking tape to mask up any areas that you don’t want to paint.
• Undercoat Primer, we used white primer because our top coat is white, plastic primer is required for undercoating plastic parts.
• Spray Cans of the top coat, we used a satin white from PlastiKote for the main panel colour and Hycote Blue RAL 5012 for the mesh and power button.
• A respirator or mask to protect yourself from inhaling toxic paint fumes.
• Basic tools for disassembly of the case or other small parts.
• Soldering iron to detach the plastic welded front panel buttons.
• Cardboard or sheets to mask off an area to spray paint in.
• Blu Tac and mails to hold and rotate small parts while painting.
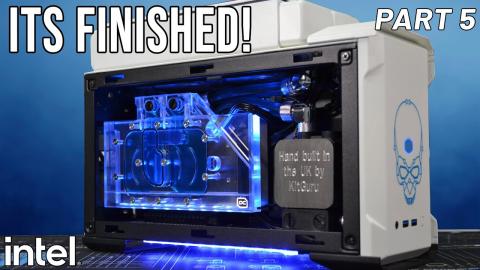
Coming up in part 5
• Fitting the final copper heat spreader and water block with our custom upper mounting bracket to the element card.
• Modifying the backplate to fit the water block mount.
• Modifying M.2 heatsinks and chipset heatsink.
• Install a laser-etched stainless steel panel to the pump/res.
• Custom LED light strips.
• Custom power cable for the graphics card.
• Building finished system and testing performance with the 240mm radiator and custom loop.
• Compare thermals and CPU performance against stock data.
• Showcase the complete system at the end. Lots of b-roll and rundown of what we did.
INTEL INNOVATION : intel.com/innovation ( https://t.co/oexmc5zGAd?amp=1)
VISIT INTEL: https://www.youtube.com/channel/UCk7SjrXVXAj8m8BLgzh6dGA
VISIT INTEL TECHNOLOGY: https://www.youtube.com/channel/UC_9tBCeHdBG13If451X7FRw
GHOST CANYON: https://simplynuc.co.uk/ghost-canyon/
SCAN: https://www.scan.co.uk/shops/intel/ghost-canyon-nuc
EBUYER: https://www.ebuyer.com/store/Components/cat/Barebones/Intel
#intel #NUC9extreme #intelmod


![Building My NEW Personal EXTREME PC Part 1! [InWin 928 SuperTower]](https://www.vortak.net/uploads/thumbs/08534db3c-1.jpg)