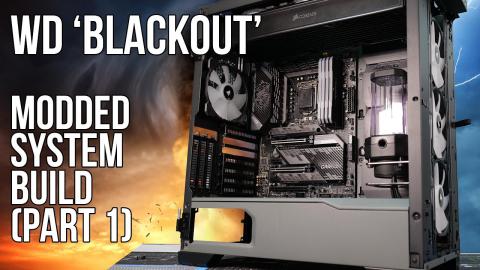
WD 'Blackout' System - Modded Build (Part 3)

Description
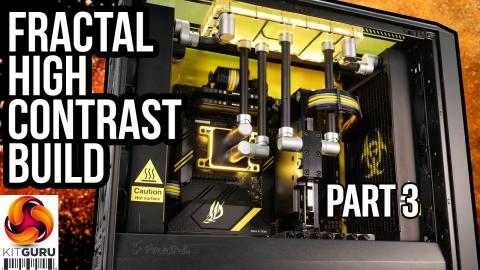
Today, we finish our Western Digital BLACKOUT build. This is the last in the trilogy! In the final video James looks at Distro Plate V2.0, sleeves the cables, and completes the final build, going over some topics and techniques he used to create the final look. We hope you enjoyed this series - we have another one coming very soon - our biggest yet! Special thanks to Corsair and OverclockersUK for helping us with parts for the build.
Read more/see more pictures here: https://bit.ly/3dvL8WC
00:00 Introduction - Western Digital Drives
02:28 Another WD drive - but its blue - OCD flag
06:28 Power Supply - cable modding
17:56 Cables done - 8 hour job!
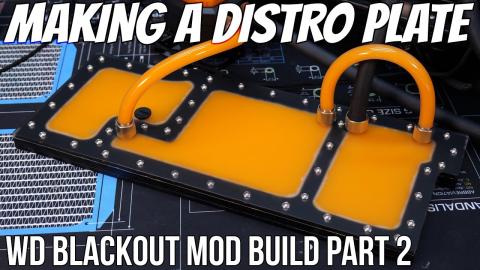
18:56 Distro Plate and acrifix 192
25:14 Distro Plate V2.0
26:31 Laser cut panels
27:06 System Specifications recap
29:08 The final build!
36:57 It's Finished!
Materials used to construct the distro plate:
• 3 x 8mm thick cast acrylic Perspex sheets
• M4 x 25mm button head black high tensile button head flange machine screws
• Acrifix 192 acrylic adhesive
• Tiger Seal
• HSS Jigsaw blades
• M4 x 0.7 HSS metric coarse machine tap
• G1/4 HSS machine tap
• 3mm HSS drill bit
• 5mm HSS drill bit
• 8mm HSS drill bit
Here are the steps I took to make the distro plate:
• Transfer the dimensions from the template to the acrylic sheet that will be used for the upper cover, I found that marking the protective film with the dimensions was done bets using a biro.
• Clamp all three pieces of acrylic together using g-clamps and bolting the sheets together in an area that will be cut off ready for cutting/drilling.
• Drill out all of the screw holes through all three pieces of acrylic while clamped together, I used a 3.3mm drill since m4 screws were being used to hold the plate together.
• After drilling out all of the screw holes, I ran an m4 tap through the screw holes while the three acrylic sheets were still clamped together and then using a jigsaw set to a slow speed with a fine HSS cutting blade, I cut out the outline shape of the distro plate.
• I then widened the screw holes in the upper two sheets of acrylic to 4.5mm using a HHS drill bit in the drill press, cut out the water channels in the central piece of acrylic and then bonded and clamped the three acrylic sheets together using adhesive and m4 machine screws.
System Specification
• CPU: Intel Core i5-11600K
• Motherboard: MSI MPG Z590 Gaming Carbon WiFi
• Memory: 32GB (4x8GB Modules) Corsair Vengeance RGB Pro SL
• Graphics Card: Asus ROG Strix RTX 3080
• Storage 1: 1TB WD Black SN850 NVMe M.2 SSD
• Storage 2: 2TB WD Blue SN550 NVMe M.2 SSD
• Case: Phanteks Eclipse P600S
• Power Supply: Corsair RM850 850W 80+Gold
Cooling – Corsair Hydro X Custom cooling
• Pump/res: XD5 RGB Pump/Reservoir Combo
• Radiator: XR7 360mm Water Cooling Radiator
• Fittings: XF Hardline 14mm OD
• Tubing: XT Hardline 14mm Tubing — Satin Black
• System Fans: 7 x Corsair SP120 RGB Elite Performance
• Distro plate: Custom Made PSU Shroud Mounted
System Mods
• Hand made PSU shroud mounted distro plate
• Blackout interior
• Custom cooling loop using satin black tubing
• Carbon Hydro Dipping
• Custom black/orange sleeved power cables
• Laser-cut WD logos on the front and side panels
Ebay molex pin removal tool:
https://www.ebay.co.uk/itm/181671493584?ssPageName=STRK%3AMEBIDX%3AIT&_trksid=p2060353.m2749.l2649
Join this channel to get access to perks: https://bit.ly/3xF9l4y
Check out KITGURU MERCH over here: https://teespring.com/en-GB/stores/kitguru-merch-store.
Discord invite link: https://discord.gg/4cqFSWY
Steam Community https://steamcommunity.com/groups/kitguruofficial
Be sure to support us on PATREON https://www.patreon.com/kitgurutech and read our MANTRA on HONEST REVIEWS Here: http://bit.ly/2BopnF9
KitGuru uses a variety of equipment to produce content:
As of February 2021:
Panasonic S1 Cameras / Panasonic GH5 and GH5s Cameras
Panasonic GH4 Cameras
Panasonic G7 Cameras
DJI OSMO Pocket Cameras
Canon Cameras
Various PC builds
Final output – colour grading/titling etc:
Mac Pro 2019 - 16 core, Radeon Pro Vega 2 Duo 64GB, 384GB, 120TB Raid
iMac Pro 18 Core/Vega 64/128GB
iMac 2019 9900k Vega 48/64/1TB
Adobe Premiere Pro CC (PC)
Davinci Resolve Studio 14/15 (Mac)
iPad Pro 12.9 inch (2018) machines with LumaFusion
Final Cut Pro (Mac)
Visit our facebook page over here! https://www.facebook.com/KitGuru.net/
Visit our Twitter page over here! https://twitter.com/kitgurupress?lang=en
#Westerndigital #modding #systemmodding